Can You Find the Long "i" in Right?
3/22/2021 | 58m 34sVideo has Closed Captions
Learn to sort things you find in nature, mix colors, read TRUCK¸ practice long e, I, o.
Learn to sort things you find in nature, mix colors, read TRUCK¸ practice long e, I, o. LET’S LEARN helps children ages 3-8 with at-home learning. One-hour programs feature instruction by educators and virtual field trips.
Problems playing video? | Closed Captioning Feedback
Problems playing video? | Closed Captioning Feedback
Let's Learn is a local public television program presented by THIRTEEN PBS

Can You Find the Long "i" in Right?
3/22/2021 | 58m 34sVideo has Closed Captions
Learn to sort things you find in nature, mix colors, read TRUCK¸ practice long e, I, o. LET’S LEARN helps children ages 3-8 with at-home learning. One-hour programs feature instruction by educators and virtual field trips.
Problems playing video? | Closed Captioning Feedback
How to Watch Let's Learn
Let's Learn is available to stream on pbs.org and the free PBS App, available on iPhone, Apple TV, Android TV, Android smartphones, Amazon Fire TV, Amazon Fire Tablet, Roku, Samsung Smart TV, and Vizio.
Providing Support for PBS.org
Learn Moreabout PBS online sponsorshipMore from This Collection
Let’s Learn helps children ages 3-8 with at-home learning. One-hour programs feature instruction by educators and virtual field trips.
Video has Closed Captions
Read SCHOOL BUS and draw one, learn about prefixes and pitch, build sculptures. (57m 48s)
Running and Counting Both End in “ing”!
Video has Closed Captions
Move to improve, find the missing number, learn songs from Ghana, read ABUELITA’S SECRET. (58m 17s)
What Sound Does “aw” Make in Draw?
Video has Closed Captions
Read a story, discover "au" and "aw," learn about density, count, and move with music. (56m 58s)
Can You Find the Short “u” in Subtract?
Video has Closed Captions
Help Super Grover 2.0 solve a prickly problem, read ALL THE WAYS TO BE SMART. (56m 19s)
What Sound Does “gl” Make in Glove?
Video has Closed Captions
Play the glockenspiel, help Super Grover 2.0 make a cart move, read TWO WOOL GLOVES. (58m 9s)
Incredible Starts with Short “i”!
Video has Closed Captions
Solve problems with Super Grover 2.0, catch a rainbow, hear a piano sound like a cuckoo. (56m 9s)
What’s the Sound of “oo” in Book?
Video has Closed Captions
Explore animals’ form and function, sing about the 3 little pigs, read THE LITTLE BOX. (58m 15s)
We’re Reducing, Reusing and Recycling!
Video has Closed Captions
Learn all about rhythm and the number 9, read A BAG IN THE WIND. (56m 17s)
Video has Closed Captions
Learn to dance bomba and grow food in a city, read WOLF CUB’S SONG. (55m 20s)
How Many Syllables are in Invent?
Video has Closed Captions
Invent your own instrument, make 10 to add numbers to 20, read ONE GOLDEN RULE AT SCHOOL. (57m 36s)
Video has Closed Captions
Learn about the science behind mind reading, count shells, read MY BIG FAMILY. (57m 27s)
Which is Heavier: One Apple or Two Apples?
Video has Closed Captions
Defy gravity, learn secret code words for fast and slow in music, read WHOOO KNEW? (58m 5s)
Providing Support for PBS.org
Learn Moreabout PBS online sponsorship[playful music] - [Narrator] Ready to learn?
- Hi.
- Hi.
- [Narrator] It's time to share a story, read and write.
- Let's read it back.
- [Narrator] Discover science, sing.
♪ Somewhere ♪ Play, and so much more.
- Cupcake!
- Very good.
- [Narrator] Stay tuned for lessons and activities.
- We're gonna start making some words.
Isn't that fun?
[playful music] - [Narrator] Funding for this program was provided by the JPB foundation.
[playful music] - Hi, everyone!
How is it going?
Good.
Well, check this book out.
Truck.
This book by Donald Crews is a very special book.
And I say that because right here, do you see that?
That's called a Caldecott Honor Award.
And when books are awarded that, they have that special metal printed on every book cover.
So now as you listen to me read, I want you to try to look for things in this book that you might see in the real world.
'Cause there's plenty of things to see along a trip.
Trucking.
In the truck, I see little pictures of bicycles.
So I know this truck is traveling with bicycles.
Let's see what he sees along his trip.
All right.
The truck starts to drive down the street and stop.
There's a stop sign.
The truck stops and the driver looks both ways.
He sees the sign that says it's a one-way street.
So he knows to turn and make a right because that sign says no left turns.
So the driver gets ready and makes a right turn onto the next street.
As the truck driver continues to drive the truck, he passes a fire hydrant.
Have you seen any fire hydrants traveling outside whether you're on train, the bus, or a car or a truck, you might see a fire hydrant.
The truck continues to drive along the street, he passes another truck.
Now, he's driving onto a highway.
And I can tell because the highway is going to take him to the tunnel.
On the highway, you have 12-foot trucks.
These are really large trucks.
Here's a large blue truck, a large green truck.
The truck goes inside following the green arrow at 40 miles per hour.
And coming out of the tow with the X is the bus.
As the truck keeps driving, now he's out of the tunnel.
Following behind him as he purple mini truck.
And he gets faster, vroom and faster, vroom.
As he continues to travel.
Then he sees all these flashing lights that say Truck Stop.
At the Truck Stop, which is open 24 hours, there's a place to get gas for the truck and a place to eat food, which is called a diner.
So the truck driver brings the truck over to get some gas, diesel only of course and then goes inside to eat at the diet 'cause he's hungry.
If the truck needs gas for energy, he needs food for energy too.
Oh no, it's raining and it's raining a lot.
So the truck driver turns on his lights.
Lights help the truck drivers see through the winding road.
As the rain keeps coming down more and more and more.
As he continues to follow the sign North 101, no more rain.
Joining him on the highway or other vehicles like this livestock be pulled by this pickup truck.
There's more trucks driving on the highway, some carrying cars.
And on the other side of the highway, we see moving trucks.
We see buses, bakery trucks, and they're moving right along.
Wow, look how busy the highway is.
Full many types of vehicles, all going fast.
The truck is now driving carefully through the thick, thick fog.
So he can safely travel across the bridge.
And the bridge is what's gonna take him over the water.
And now, he needs to decide which way to go.
Does he go West, North or East?
Well, the yellow truck is gonna go West and our red truck's gonna travel east now.
And he made it on time to this destination.
Now he's reversing his truck [makes beeping sounds] and backing it up to the loading dock.
And his loading dock is where he opens all the doors to take out all the bicycles he traveled with.
The end.
And that is the story, Truck.
So let's talk about it.
What were some of the things that we saw along the way?
Street sign.
What else did we see along the way?
Other vehicles to travel it.
Buses, vans, cars, right?
What else did we see when we were reading?
What's this?
A fire hydrant.
Yes.
So I encourage you when you go outside and travel with your family and loved ones, take a look around and see if you can find any of the things from this book outside in the real world.
Okay.
So now that we've read our story and we talked about it, let's do a fun activity.
Let's create some art.
We're gonna create it using shapes.
And one of my favorite kinds of trucks is a fire truck.
Today, I'd like to show you how to use shapes to create a firetruck.
It's called shape art.
Some things you will need.
Scissors.
- [Narrator] Ask a trusted adult for help using scissors.
- Colored paper, and a glue stick.
And you may need a trusted adult at home to help you.
I'm going to use a piece of orange paper today.
And I made some shapes.
Three little circles, three big circles.
Altogether, six circles.
Two squares.
One big square, one little square.
Altogether, two squares.
Two rectangles, one big rectangle, one little rectangle.
Take all together, two rectangles and one trapezoid.
All right, so let's get started.
We are going to make a fire truck.
I'm going to first take my large rectangle.
Then I'm going to take my glue and I'm going to squeeze some glue in the corner.
So one corner, a second corner, a third corner and the fourth corner.
So now that there's glue in all of my corners of my rectangle, I'm going to simply flip it over and glue it down on the paper like this, and then give it a nice rub.
[playful music] I'm going to take my large square.
And I'm gonna squeeze some glue in all four corners.
And I'm going to glue it next to the rectangle in a little higher up.
And I give it a rub.
Okay, now it's time for that trapezoid.
I'm gonna take my glue and I'm gonna put some glue in all of the four corners.
And we're gonna put the trapezoid right on top of the square.
And give it a rub.
Our second rectangle.
We're gonna put glue in the four corners.
One, two, three, four.
And I'm going to glue it to the top of this rectangle.
And I put some glue.
Now I'm gonna rub it.
So now I have my other square.
We're gonna put a dab in all of the corners.
This shape has four corners, just like all of the others.
Now I'm gonna glue this little square on top of the big square.
Watch.
It's in the top right corner.
Let's get our three large circles.
One, two, three.
So now, going to trace the circle with my glue, watch.
Trace the circle with my glue.
When to do that to my second circle, make a curved line to trace the circle and let's do it one last time on our third circle.
Right.
So I'm gonna take my first circle, glue that to the back of the truck.
I'm gonna pat it down.
Then I take my next circle next to my first circle and I give it a rub.
Now my last third circle.
See this little corner?
We wanna make sure our circle covers some of that.
It fills in that empty space, just like that.
Now we can rub it, pat it down.
So it stays nice and secure.
It looks like minded, that's okay.
Just spread it back.
No big deal.
All right.
So let's continue with our circles.
The circles are going to be the wheels of our firetrucks.
Now you should have three little circles.
One, two, three.
We're gonna take some more glue and we're gonna put a dab in the middle of our circle.
Dab.
Dab.
And last circle.
Dab.
So now we're gonna take that circle and put it right in the middle of the bigger circle, press down.
Put it right in the middle of the big circle and pat it down.
And the last circle, same thing.
Put it in the middle of the big circle, pat it down.
And there you go.
That is your sheet bar for a fire truck.
We have the wheels, the special ladder and the top siren.
So good job in making shape art today.
Today we made fire trucks.
I'm so proud of you.
You did awesome.
And if you didn't get to join, remember, you can do this activity at home.
Just ask a trusted adults to help you cut out your sheets.
Remember you need six circles, two squares, two rectangles, one trapezoid.
And when you put it together, you'll have a beautiful firetruck just like me.
And again, thank you for joining me for story time and reading the Caldecott Honor Book Truck by Donald Crews.
I'll see you next time.
- Hi, movers and shakers.
This is violet.
And today, we have some special guests.
My cousins, Liam and Aiden are gonna help us sing a song called Rattlin' Bog.
They're gonna sing the call and I'm gonna sing the response.
That means they're gonna say something and I'm gonna repeat after them.
Can you help us sing this song together?
Great, all right.
♪ Ho, ro, the rattlin' bog ♪ ♪ The bog down in the valley o ♪ ♪ Ho, ro, the rattlin' bog ♪ ♪ The bog down in the valley o ♪ ♪ And in the bog ♪ ♪ And in the bog ♪ ♪ There was a tree ♪ ♪ There was a tree ♪ ♪ A rare tree ♪ ♪ A rare tree ♪ ♪ A rattlin' tree ♪ ♪ A rattlin' tree ♪ ♪ Tree in the bog ♪ ♪ And the bog down in the valley o ♪ ♪ Ho, ro, the rattlin' bog ♪ ♪ The bog down in the valley o ♪ ♪ Ho, ro, the rattlin' bog ♪ ♪ The bog down in the valley o ♪ ♪ And on that tree ♪ ♪ And on that tree ♪ ♪ There was a branch ♪ ♪ There was a branch ♪ ♪ A rare branch ♪ ♪ A rare branch ♪ ♪ A rattlin' branch ♪ ♪ A rattlin' branch ♪ ♪ The branch on the tree ♪ ♪ And the tree in the bog ♪ ♪ And the bog down in the valley o ♪ ♪ Ho, ro, the rattlin' bog ♪ ♪ The bog down in the valley o ♪ ♪ Ho, ro, the rattlin' bog ♪ ♪ The bog down in the valley o ♪ - That was so much fun.
Thanks Liam and Aiden.
Thanks, everyone.
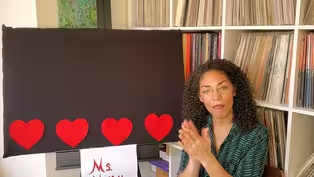
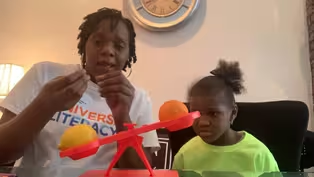
[playful music] - Hello, friends.
I'm Ms. Carissa, and this is my daughter Liliana.
Today, you will need to be really good listeners.
[chuckles] And try to participate by repeating out loud, along with me.
As well as have something ready to write with and write on.
Maybe a trusted adult could go get that ready because you will need it for our last activity.
Let's get started.
For our first activity, we will be blending sounds to say words.
I will say each sound in a word.
Then you will blend the sounds to say the word.
Listen to me blend first.
Okay, listen to me.
G-a-ve.
When I blend g-a-ve, I say the word gave.
Now it's your turn to blend sounds to say a word.
Ready?
Ready?
Listen to the sounds.
D-i-sh.
Listen again to the sounds.
D-i-sh.
What is the word?
- Dish.
- Did you say dish also?
Great.
Let's do some more.
Here I have some picture cards.
I will say the sounds and you will blend the sounds together to say the word.
I will move my finger under the pictures like this.
And I want you, you also, to tell me to stop when I am pointing under the picture card that for the word that you just blended.
Ready?
Ready?
Okay.
Listen carefully.
B-ee.
Again, b-ee.
Okay, think about what that word is.
I'm pointing.
Tell me when to stop.
- Stop.
What?
What's the word?
- Bee.
- Bee.
Excellent, okay.
Ready for the next one?
H-ay.
Listen again.
H-ay.
Okay, tell me when to stop.
- Stop.
- Oh, did you say stop?
Great, what's the word?
- Hay.
- Hay.
Okay, let's do another one.
Kn-i-fe.
Listen again.
Kn-i-fe.
Ready?
- Stop.
- You said to stop also?
Great.
What's the word?
- Knife.
- Knife.
Okay, let's do another one.
P-o-t. Again, p-o-t.
Okay, ready?
- Stop.
- What's the word?
- Pot.
- Pot.
Great, let's do another one.
Th-u-mb.
Ready?
Th-u-mb.
What's the word?
- Stop.
- What's the word?
- Thumb.
- Thumb, great.
Last one.
W-e-b, w-e-b.
Ready?
Tell me when to stop.
- Stop.
- What's the word?
- Web.
- Web.
Excellent job.
Good work.
Blending sounds to say words.
Nice job.
Let's move on to our work with identifying and naming the medial vowel sound in words.
Listen, as I do the first one.
The word is line.
If I stretch it, I would hear the middle vowel sound better.
Line.
The middle vowel sound in line is I.
Did you hear it?
Did you hear it?
Listen again, line.
I is the long I sound.
Now let's do one together.
Say the sound in the middle of the word rug.
We could stretch it so that we could hear the middle vowel sound.
Rug.
What's the middle vowel sound in rug.
- Uh.
- Uh.
Did you say uh?
Great.
Uh it's the middle vowel sound in rug.
Is uh the long U or the short U sound?
- Short.
- Great, it's the short U sound.
If you said the short sound, then you are correct.
Let's keep going.
I will say the word.
I will stretch the word.
And I want you to say the vowel sound and then name it as long or short.
Ready?
Hope.
Hope.
What is the vowel sound?
- O.
- O.
Is the vowel sound long or short?
- Long.
- Great.
Here's another one.
Late, late.
What is the vowel sound?
- A.
- A.
Is that vowel sound long or short?
- Long.
- Long, great.
Okay, here's another one.
Red.
Red.
What is the vowel sound?
- Eh, E. - Listen again.
Red.
What's the vowel sound?
Eh.
I hear eh in red.
- Is that vowel sound long or short?
- Short.
- Good.
All right, here's another one.
Nice, nice.
What is the vowel sound?
- I.
- I.
Is that will sound long or short?
- Long.
- Long, excellent.
Okay, here's the last one.
Tote.
Tote.
What is the vowel sound?
- O.
- O.
Is that vowel sound long or short?
- Long.
- Excellent.
Marvelous job listening and identifying the medial vowel sound in words.
Now let's take a look at our sound spelling cards for the long vowel sounds.
E, I and O.
Remember when there is only one vowel in a word and it is at the end., the vowel usually stands for the long vowel sound.
Let's take a look at Eagle.
Eagle starts with the sound E. And there are many spellings for the long vowel sound E. Today, we are reviewing the spelling, E. Ice cream starts with the sound I and there are also many spellings for the long vowel sound I.
Today we are reviewing the spelling, I.
Ocean starts with the sound O.
And there are also many spellings for the long vowel sound O.
Today, we are reviewing the spelling O.
Now I will show you how to blend letter sounds and to code words with the letters E I and O when it comes at the end of a word.
Here, I have a word.
The letters are M, E. Watch how I blend the sounds to read the word.
Here I see one consonant followed by one vowel, E. So the sound here is represented as E. M-e. Now I will blend the sounds to get the word.
Me.
Let's try another one.
Here I have N, O.
Again, I see one consonant followed by the vowel O. I'm gonna say the sound.
Do you wanna join me?
N-o.
Let's blend the sounds to say the word.
No.
Okay, I have one more.
H, I.
Same thing, I have the continent followed by a vowel.
So I know my vowel will be the long sound.
Say the sounds with me.
H-I.
Blend it together to read the word.
Hi.
Great work with that.
Now, let's use all we know about blending sounds and words to help us read sets of words in a sentence.
I will point to the word and I'm gonna pause so that you could try reading it before me.
Ready?
Be.
Hi.
He.
So.
Me.
What do you notice about the words?
How are they alike and different?
Yeah, they all have one vowel at the end and that vowel at the end represents the long vowel sound.
You also notice some rhyming words?
Be, he, me.
Great.
So what's different?
Right.
There are different vowels and different long vowel sounds.
Let's continue with these words.
Go.
She.
We.
No.
Do.
What do you notice that is different about the last word?
Right, the word do does not follow the rule taught today where the vowel at the end represents the long sound.
The O here doesn't represent Oh, it represents uh.
So that is one of those things you're gonna have to remember.
This is the word do.
Let's read a sentence.
Try it out.
Okay, this says, we go to my house to eat.
I see the word we with that long E sound at the end.
Now let's move on to spelling words.
Our last activity.
You will now need what you brought to write with and write on.
Watch how I write and spell the word so.
As in this is so much fun.
Stretch it.
Listen for each sound.
So.
S-o.
Think what spelling represents the sounds.
S, O.
And then check it, so.
Your turn.
Spell the word go.
Stretch it.
Go.
Listen to each sound.
G-o.
Did you spell it like this?
G-o, go?
Excellent.
Now spelled the word be.
Stretch it, be.
Listen for each sound.
B-e. Is this how you wrote it?
Be?
Great, excellent job.
Okay, everyone, you did such a great job today.
Blending sounds to say words, reading words and spelling words with the long vowel sounds.
E, I and.
- O.
- O. when it comes at the end of a word and spelled with the letters E I and O.
Make sure you tell a trusted what you learned today.
Be sure to tune in tomorrow, to continue learning about blending sounds decoding and spelling words.
See you next time.
[playful music] - Hi, everyone.
My name is Norah.
And today, I'm gonna tell you how you can be a scientist at home and how I like to be one too.
But first, I'm really hungry.
Would you mind if I had a snack?
Thanks.
Thankfully, I have my trail mix here.
Hmm.
Very tasty.
I noticed something about my trail mix.
My trail mix is a mixture of a lot of different kinds of food.
Hmm.
I wonder if I could do something to help me figure out what all the different kinds of food are and how many I have of each kind.
I know.
Let's sort it.
I have this muffin tin here that I can use to help me.
I can put each different type of food in its own cup.
And then I can count how many I have of each one.
Let's try it.
Okay.
So it looks like I have four different kinds of food.
I have raisins, peanuts, almonds, and M&M's.
So I'm gonna sort out all of my.
[upbeat music] So I've sorted all of my food into the four different categories.
Now let's count how many we have of each one to see which one we have the most and which one we have the least.
So for M&M's I have one, two, three, four, five, six, seven.
For almonds, I have one, two, three, four, five, six, seven, eight, nine, 10.
For peanuts, I have one, two, three, four, five, six, seven, eight, nine, 10, 11, 12, 13, 14, 15, 16, 17, 18, 19, 20, 21, 22.
And for raisins, I have one, two, three, four, five, six, seven, eight, nine, 10, 11, 12, 13, 14, 15, 16, and 17.
So we learned by sorting that I have the most peanuts in my trail mix and the least M&M's.
That was fun.
I like sorting.
I wonder if there's anything else I could sort, hmm.
I know.
I'll go for a nature walk outside and I'll try to collect some objects that I can sort.
I'm going to challenge myself to find 10 small objects that I can bring back and sort at home.
Now you can do this too.
You can go for a walk to find objects to sort but remember to go with the grownup and to make sure you don't pick up anything unsafe outside.
You could also do a walk around your home to collect objects, too.
Okay, see you in a little bit.
I'm back from my walk.
And I found a great collection of objects to sort.
I had to use my observation skills and look closely while I was walking to make sure I found some good objects.
Let's take a look at what I found.
Here's what I found on my walk.
A pine cone, the spiky seed pod, a piece of wood, an acorn, this stick, this yellow leaf, another different kind of leaf, these pine needles, a rock and another leaf.
To do my sorting this time, I'm gonna make a sorting box.
You can make one at home, too.
All you need are some scissors, a cereal box or some other kind of box that's kind of flat.
And some markers or a pen.
And what you're gonna do is just cut off the top to your cereal box, like this - [Narrator] Ask a trusted adult for help using scissors.
- And then I have my box like this.
And then I'm gonna make some categories for my different objects.
So I'm gonna use my markers for this.
And I can just draw some lines like this.
Here's one category, that's blue.
A category that's orange.
And I think one category, add some green.
Now I'm all ready.
But this time, I have 10 pretty different objects.
When I started my trail mix, I had more than one of each type of food, but these all look pretty different.
So how do I sort it?
I know.
I'll sorted by property.
Do you know what a property is?
A property of something is a word you would use to describe it.
So it's a trait that the object has.
Like its shape, its size, its color or where it comes from or what you use it for.
So for instance, if I was gonna describe this candy, I might say it's round, it's blue and it tastes sweet.
Okay, I think the first property I'm gonna use is color.
I'm gonna sort them objects by color.
So it looks like I have, this leaf is yellow.
I'll put that in my blue box.
And then this seed is kind of a really like a tan or really light brown.
So I'll put that here.
And this pine cone is kind of a darker brown.
So I'm gonna put that in my last box.
Okay, so this leaf, it's also kind of a darker brown.
This acorn is kind of a light tan color.
This leaf is also kind of a darker brown.
This is kind of a lighter color.
This is a darker brown.
This is also sort of stick is a darker brown, I think.
And then finally, my rock also is a dark brown.
So it looks like I've got a lot of dark brown, a little bit of light brown or tan and one yellow leaf.
I wonder if I started with a different property if I would have the same results.
Let's try it.
I think this time I'm gonna sort by size.
And to help me, I have a tape measure.
A tape measure is a science tool that helps us see how big something is by measuring it.
Take everything out of my box.
And I'm gonna measure what I think is the longest part of each object.
So you take my twig and I'm going to measure across my tray.
And it looks like it's nine inches.
That's really long.
So I'm gonna put that over here and let's see.
What about my net house?
How big is my net?
My net is less than one inch.
So that one's gonna go in my short side over here.
So let's see.
Anything less than four inches is gonna go over here.
And anything more than seven inches is gonna go over here and then anything in between is gonna go in the middle.
So let's see.
Is there anything else that's less than, this is four inches.
Let's see.
This is more than four inches.
This leaf is less than four inches.
What about this one?
That's less than four inches.
That's less than four inches.
It's less than two inches.
What about this leaf?
This leaf, oh, this leaf is almost four inches but it's not quite.
What about this leaf?
This leaf is more than four inches.
What about this twig?
More than four inches.
And my pine cone is one of the largest too.
So we said if anything was more than four inches but less than seven inches, it would go in the middle.
Here's seven inches.
So let's see, are these less than seven inches?
This one is five and a half.
That's less than seven.
This one is four and a half.
That's less than seven.
Let's see about this leaf.
This leaf is five inches.
That's less than seven too.
And my last one, my my pine cone is six and a half inches.
That's also less than seven.
So look at that.
When I sorted it by how big they were, I have one really long twig.
And then I have about even.
It seems like medium-sized and really small objects.
You can find some objects to sort at home too.
It can even be a fun guessing game.
If you sort all your objects and then ask a grown-up or someone else at home to guess which property you use to sort them.
Try to think of some creative properties to use like what texture you feel on the outside of the item or where you found it or what material the item is made out of.
I know some friends who did their own sorting game at home.
Let's see what they found and how they sorted it.
- Hi, my name's Christie.
I am six years old.
This is my sister.
- I'll show my name and I'm four years old.
C-A-I-L-N-N. Cailnn.
- Yes, we're gonna sort beads.
Here's my bag of beads.
I'm gonna dump it up.
And I was gonna take all of the feather ones and put it right in this pile.
Now we're gonna do some fisher ones.
Fishies.
- Fish, fish, fish, dop dop dop.
- Now we are going to do starfishes.
Taking for moon, that's it.
Now we are going to do some of the sea shells.
Now we are going to do butterflies over here.
Now we're gonna do golden.
Now we're going to do flowers.
Then we're gonna do light blue.
And then we're doing pink over here.
Cailnn, would you like to put these inside there?
- Can we do do this here?
- You do this one.
And add to this one.
You put these ones in each box.
And now we're gonna count.
The greatest number is these two.
They're both the greatest number.
- That was a lot of great sorting.
Sorting helps us look closely at objects and practice our observation skills which scientists use a lot.
Remember, you can be a scientist at home every day.
If you stop to notice and wonder about the world around you.
So your next time.
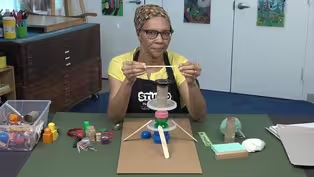
[playful music] - Hi, artists.
My name is Daniel.
I am an artist with Studio in a School.
And today, we're going to mix colors.
These are the materials that you will need.
Crayons, colored pencils or markers.
You will also need paper.
Drawing paper, notebook paper, printer, paper, or any kind of paper that you can find at home.
[playful music] Artists, before we start mixing colors, I would like for us to take a look at my crayons.
What colors do you see?
I have several colors.
But for today, I would like for us to choose just three colors.
And I'm gonna choose these three colors here at the bottom.
We're gonna choose the yellow, blue and red.
Artists, these three colors have a very special name.
Do you know how we usually call them?
We call them the primary colors.
And they also have a very special quality.
We can use them to mix and make other colors.
Would you like to see how each one of these three primary colors look like on paper?
And would you like to see what new colors we can make by using these three primary colors?
Great, let's begin.
What color should I use first?
We can use any of those three colors.
Now for the moment, I'm going to choose yellow but we could begin with blue or with red as well.
So I'm gonna move my colors out of the way.
And I'm gonna start with color yellow.
Now, where should I start?
On the top, in the middle or at the bottom of my paper.
I would like to start in the bottom.
Now I can move my hand in different directions.
I would like to start moving my hand up and down, up and down a little bit.
I wonder what happened if I press lightly.
And I'm going to start here almost close to the bottom corner.
I'm gonna go up and down, very softly.
Are you able to see this color yellow here on my paper?
How can I make it a little bit brighter or a little bit more visible?
Let me try to put more pressure.
So I'm gonna press a little bit harder.
Oh, I'm beginning to see my yellow a little bit better.
Do you think I could press a little bit harder?
Let me try.
I don't wanna press too hard because I don't wanna break the crayon and really try to press a little bit harder than before.
Did you notice?
And it was making a very loud sound but it looks a little bit brighter.
So now I have yellow on the bottom of the paper.
And what did you notice what happened when I was pressing a little bit softly and what happened then when I was pressing a little bit harder.
Do you notice that I can make my color a little bit lighter and then a little bit brighter or more visible?
Okay, artists.
I would like to have yellow in another part of my paper.
Where should I put a little bit more yellow?
Maybe here right in the middle.
And I would like to move my hand from one side of the paper, to the other almost.
Let me do that.
I'm moving my whole arm.
Do you notice?
To make sure that I go from one side to the other.
Let me press a little bit more here right in the center of this patch of color.
Just to make my yellow really, really, really bright.
Okay, artist.
Now I would like to try another color it on my paper.
What color should I use next?
I wonder what happened if I press lightly with my color blue.
Let me see what happens with the blue when I put more pressure.
Whoa, did you notice?
It gets a lot darker?
We can see it a little bit better.
I would like to put a little bit of blue here in between these two patches of yellow.
So I'm going to maybe move in a diagonal or a slanted.
Notice that I'm moving in this direction, in a diagonal direction?
I'm going to put a little bit more pressure now.
Okay, artists.
So I have yellow.
I have blue.
Now, let me put a little bit of red first so we can see a three primary colors.
Where should I put red?
I have some space in the top, in the middle, maybe in the bottom corner.
I love this pointy parts, the corners.
And I also really like the side of the paper, these sides or the edge.
So let me try a little bit on the top corner.
And I'm gonna go up and down.
Let me start very softly.
I'm gonna press softly.
Do you notice what happens with the red when we press softly?
I wonder what would happen if I press a little bit harder?
What do you think will happen?
Let me see.
Oh, I'm pressing a little bit harder then look.
Wow, artists.
Do you notice how these two are very close together?
Look at this too.
They're also very close together.
The yellow and the red here right in the middle of the paper.
Okay, artists.
So I noticed that I can put the primary colors in different places of my paper and I can press softly or hard.
Now, I also told you that with these primary colors, we can make new colors.
So let me try to do that.
I would like to take my yellow and I would like to put them maybe let me see on top of the red or on top of the blue.
Let me start by putting some yellow on top of the blue, here at top part of the paper.
So I'm gonna go on top and I'm gonna move around and around on the around.
What do you think will happen?
What is happening here?
Wow, do you notice?
What color do we begin to see here?
Yes, green.
So we start to mix screen.
Now, let me see what happens if I put the blue on top of the yellow now.
So here, I put the yellow on top of the blue.
Let me try the other way around.
And I'm gonna move in a different direction.
We're gonna move up and down and I'm gonna go right here on top of this patch of yellow.
Do you notice?
I also made green but they are a little bit different.
Let me put a little bit more blue here in between my two greens.
I'm gonna go all the way on top of this green all the way up on top of the other green.
Wow, do you notice?
I'm making different kinds of greens.
Do you notice some greens that are lighter or darker?
Or some greens that have more yellow or more blue?
I'm gonna put a little bit more yellow on top of this green just here, just on the bottom part of this green patch.
Wow, do you notice?
I'm changing it a little bit just by adding more yellow on top.
Okay, yes may color colors.
Where should I put this yellow?
Since I have yellow on my hand, let me try it on top of the red.
Now I press very softly here.
Let me see what happens if I just press a little bit softly here on top of this red.
What do you think will happen?
What color are we going to get?
I begin to see a little bit of the color orange.
And let me tell you if I can mix it better.
So I'm gonna put a little bit of red on top of the yellow and see what happens.
I'm gonna put a little bit of red here very softly on top of this yellow.
Do you notice?
I'm making color orange but it looks a little bit different than this one on the top.
Let me add more yellow and move in in a different direction to see.
Artists, so I'm mixing different kinds of the color orange and I'm mixing also different kinds of green.
What colors should I next mix?
Oh, yes.
I'll try to mix these two here right in the middle.
I'll try to mix red and blue.
And then mix [indistinct].
So I'm gonna start using red on top of the blue and let's see what happens.
What color do you think we're gonna get this time?
We already mixed green with yellow and blue.
Orange with green and yellow.
What new color do you think we're going to mix by putting the red and the blue together?
Let's see, let's try.
I'm gonna put a little bit of red right here on top of the blue.
[playful music] Do you notice any new colors here?
Wow.
Do you notice what new color we're mixing here?
This is very hard to see sometimes because it's dark and we're mixing purple.
So artists, do you notice this one has a little bit more red?
This one has a little bit more blue.
So we can mix a lot of different kinds of color purple.
Different greens and different color orange.
Let's take a look at my paper for a moment.
This is very exciting because we discovered that by using yellow, blue, and red, we can make new colors.
What new colors did we make?
I noticed that we make green, orange and purple.
Now, do you think that we can discover new ways to make purple or new kinds of purple, new kinds of orange and new kinds of green?
I would like to continue working on my paper and I would like to feel as much as I can of the paper.
Just to see how the colors look like together.
Would you like to continue working with me?
Great.
I'm pressing hard.
Okay, artists.
I think I feel a lot of different parts of my paper.
I have colors on the top, in the middle, in the bottom.
I try to mix different kinds of green, different kinds of orange and different kinds of purple.
Look at all the colors that we mixed today.
Now, we discovered something.
That by using the primary colors, like yellow and blue or yellow and red or red and blue, we mix new colors.
Like green, orange and purple.
Now these three colors also have a special name.
They are called secondary colors.
I wonder since color is all around us, do you think that we can find some objects that are green, orange and purple?
Let's try.
Let's take a look.
Look at the objects that I found.
I found a container and a plastic cup.
What do you notice about their color?
They're both green.
But if you notice, they are different greens.
Look.
What color do you see?
Orange?
Yes, I found this orange.
Artists, look.
What kind of object is this?
Yes, it is a paintbrush.
Let's look at the handle.
What color do you notice here in the handle?
It is purple.
Artists, I continue working and I found a lot of different colors.
Let's look at my paper together.
[playful music] Artists, it is now your turn to try to mix the primary colors, yellow, blue, and red to find the secondary colors, green, orange, and purple.
Try to feel as much as you can of the paper.
Try to put more pressure, less pressure, move your hand in different ways, in different directions.
And also try to add some times more yellow or more blue or more red to see how your colors change.
And remember to also look around your home for objects that are green, orange or purple or that have a little bit of this colors.
You can also ask a trusted adult to help you find these colors at home.
Artists, have fun, and I'll see you next time - [Narrator] Funding for this program was provided by the JPB foundation.
[playful music]
Support for PBS provided by:
Let's Learn is a local public television program presented by THIRTEEN PBS
